Step 10: Create a Pull Request (PR)
This step is necessary when you are COLLABORATING on a project with other people. I will show you in a moment how to share a repository with others.
But right now we will jump ahead and assume that the repository on github is accessible by others (they can read/write).
This means that someone else may have created a new branch and pushed the branch to the repository that YOU OWN.
They then want to be able to MERGE those changes into the master branch. However – they need to make a special request to do so – and only YOU THE OWNER of the repository can make the actual merge happen.
This special request is called A pull request and is a way to alert a repository’s owner(s) that you want to make some changes to their code. It allows them to review the code and make sure it looks good before putting your changes on the master branch.
We will now go through the motions for submitting a pull request (our remote test2Branch is to be merged with the remote master branch).
This is what the PR page looks like before submitting the request (click on the “new pull request button” in the github page:
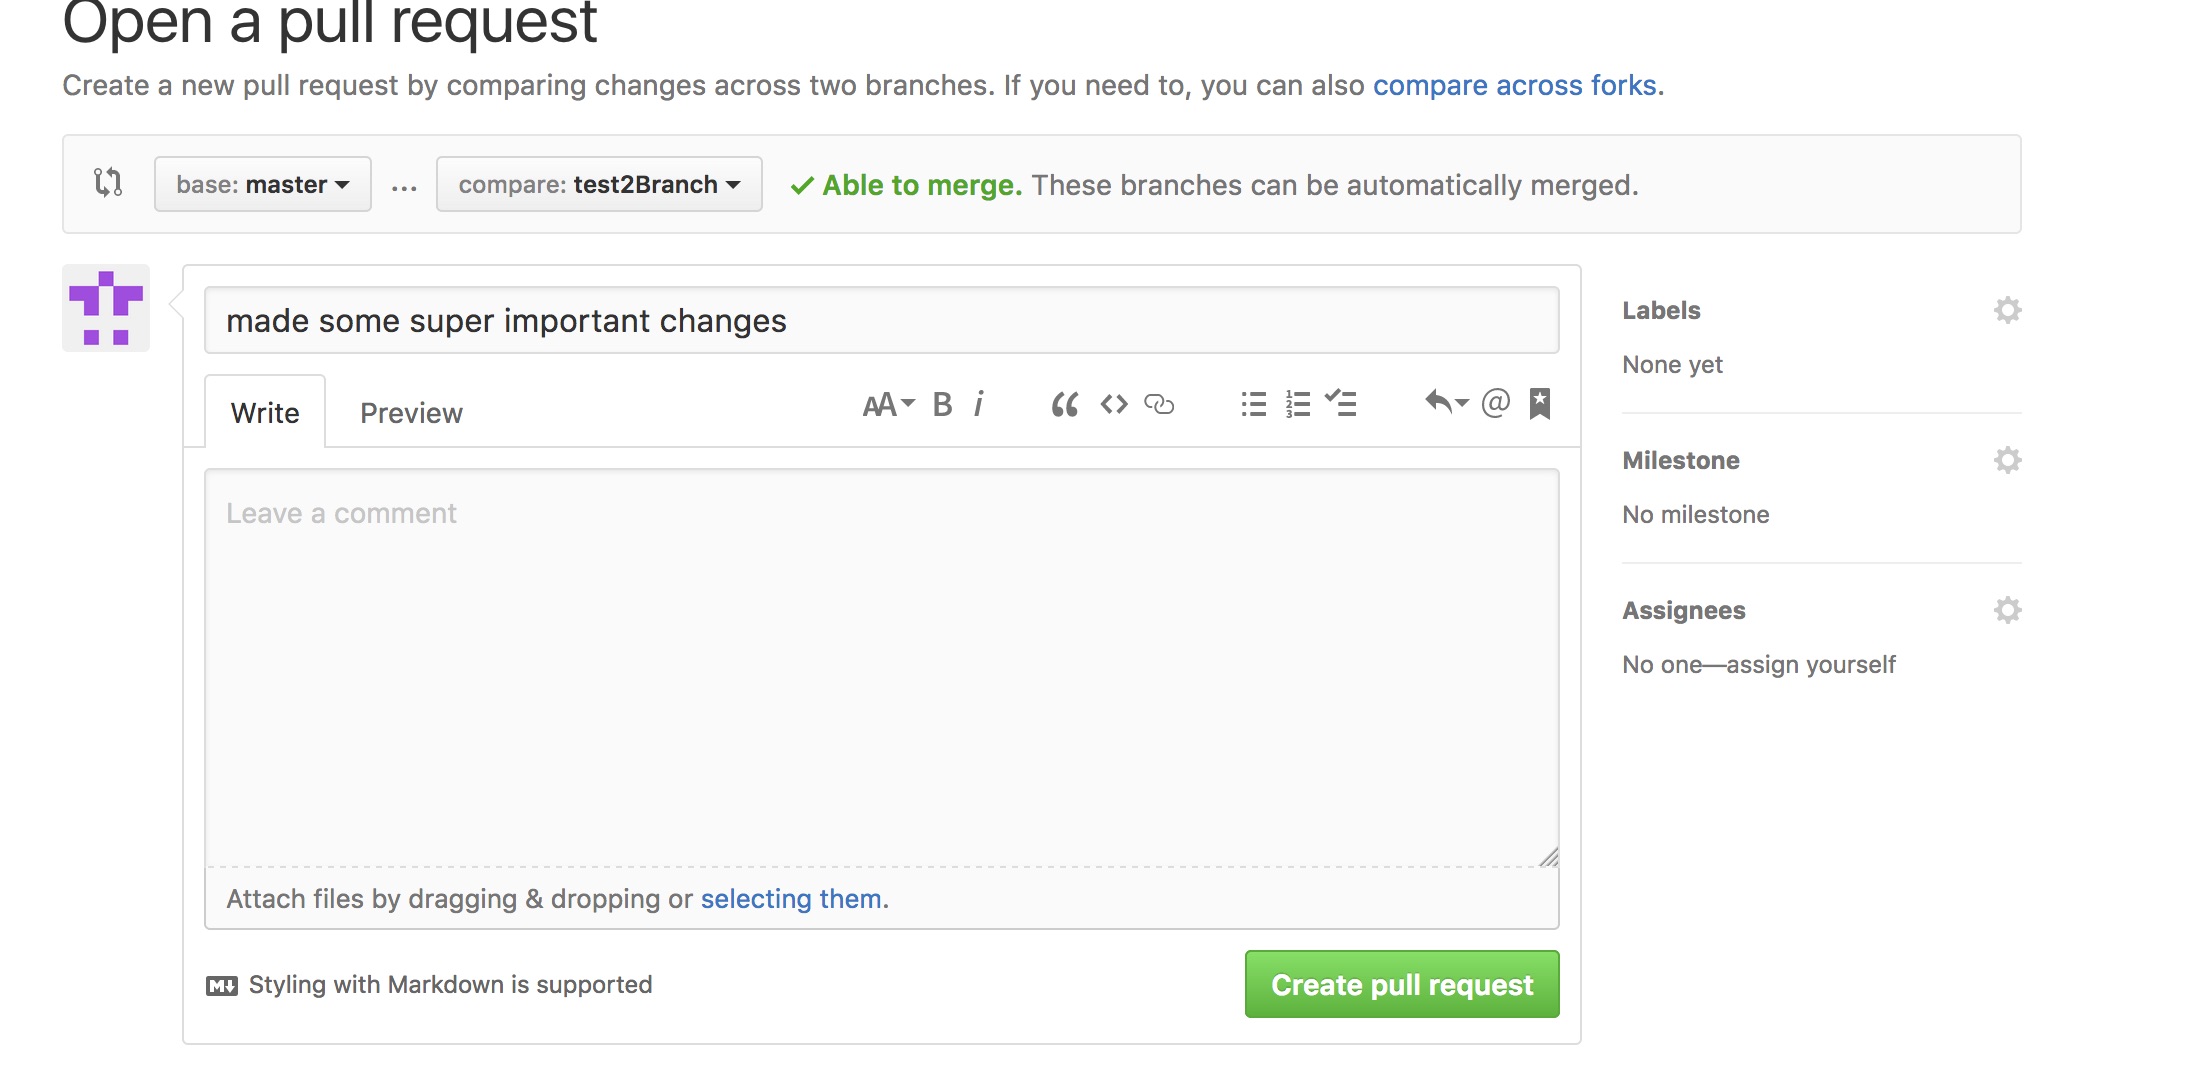
Now fill out the info and click on the green submit button – you should now see a page like this:
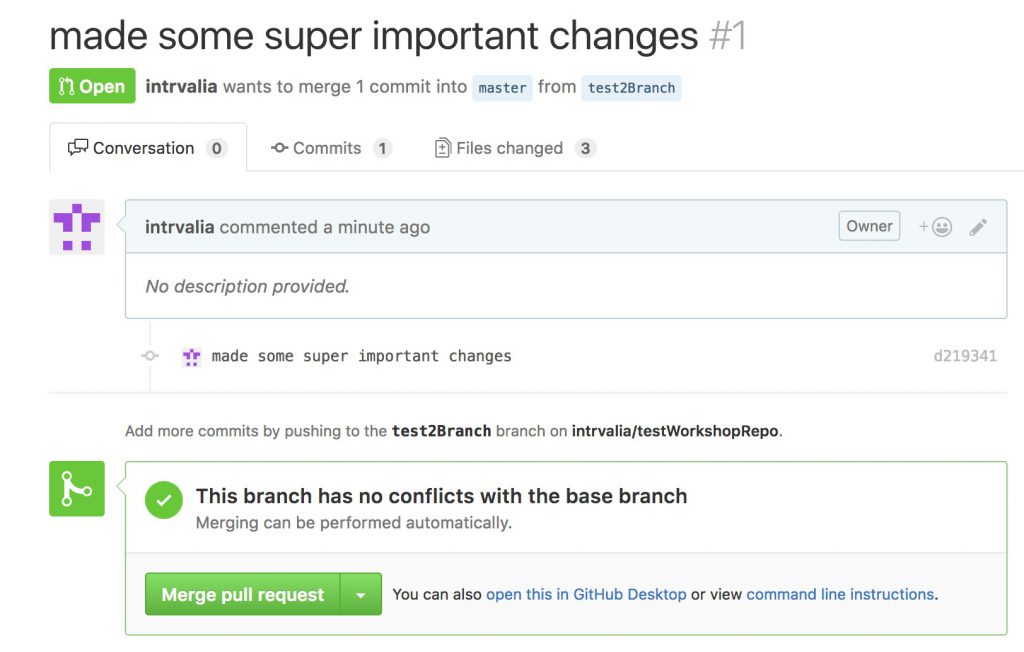
You should see a big green button at the bottom that says ‘Merge pull request’. Clicking this means you’ll merge your changes into the master branch.
Note that this button won’t always be green. In some cases it’ll be grey, which means you’re faced with a merge conflict. This is when there is a change in one file that conflicts with a change in another file and git can’t figure out which version to use. You’ll have to manually go in and tell git which version to use.
Sometimes you’ll be a co-owner or the sole owner of a repository, in which case you may not need to create a Pull Request to merge your changes. However, it’s still a good idea to make one so you can keep a more complete history of your updates and to make sure you always create a new branch when making changes.
Step 11: Merge a Pull Request
Go ahead and click the green ‘Merge pull request’ button. This will merge your changes into the master branch. You should now see this:
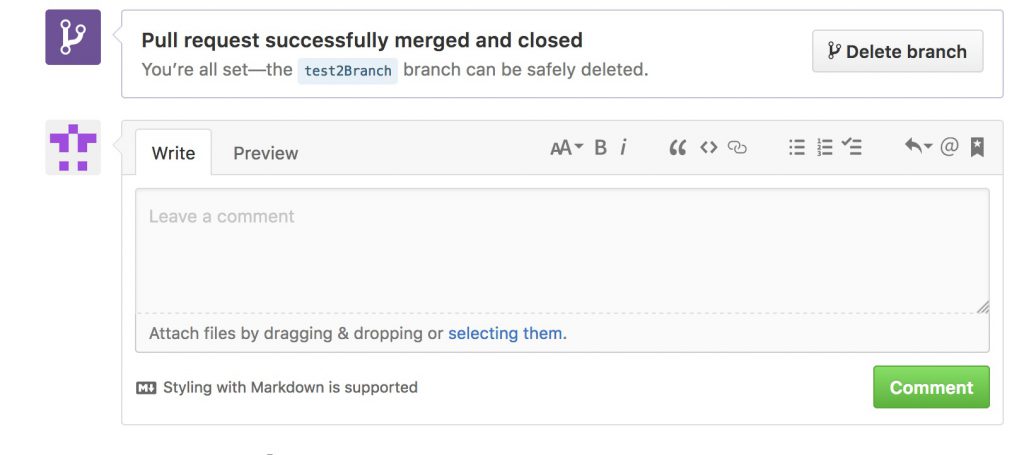
When you’re done, I recommend deleting your branch (too many branches can become messy), so hit that grey ‘Delete branch’ button as well.
You can double check that your commits were merged by clicking on the ‘Commits’ link on the first page of your new repository.
Note:: We have ONLY changed the remote repository – your LOCAL version should NOT have changed in the slightest … However – what if we now want the changes that were done remotely reflected in our local master branch?
In order to get the most recent changes that you or others have merged on GitHub, use the git pull origin master command. Note that “a pull” is different to “fetch” – basically a “pull” command WILL change your local repository in that it fetches the remote master branch AND then merges the remote version with the local version . You may find there are cases where git will not successfully pull – in that there are conflicts between your local master and the remote version. In this case git will notify you and you will need to perform conflict resolution.
First: make sure you are on the local master branch by using the git checkout master command:
1 2 3 | te:testProject te$ git checkout master Switched to branch 'master' Your branch is up-to-date with 'origin/master'. |
Now perform the git pull origin master command:
1 2 3 4 5 6 7 8 9 10 11 12 13 14 | te:testProject te$ git pull origin master remote: Counting objects: 1, done. remote: Total 1 (delta 0), reused 0 (delta 0), pack-reused 0 Unpacking objects: 100% (1/1), done. From https://github.com/intrvalia/testWorkshopRepo * branch master -> FETCH_HEAD 7cdf780..d50044c master -> origin/master Updating 7cdf780..d50044c Fast-forward testCFile.text | 1 + testFileA.txt | 3 ++- testFileB.txt | 1 + 3 files changed, 4 insertions(+), 1 deletion(-) create mode 100644 testCFile.text |
This shows you all the files that have changed and how they’ve changed. Now we can use the git log command again to see all new commits:
1 2 3 4 5 6 7 8 9 10 11 12 13 14 15 16 17 18 19 20 21 22 23 24 25 26 27 28 29 30 31 32 33 | te:testProject te$ git log
commit d50044cea7f5473bead90546ac24587a47a856bf
Merge: 7cdf780 d219341
Author: intrvalia <intrvalia@users.noreply.github.com>
Date: Sun Sep 25 16:49:52 2016 -0400
Merge pull request #1 from intrvalia/test2Branch
made some super important changes
commit d2193410a8db1bf677a3ee4c63d6f0ba0ce38600
Author: intrvalia <sr@intrval.xyz>
Date: Sun Sep 25 16:06:57 2016 -0400
made some super important changes
commit 7cdf78028c618df89ffe29b3699b9f5d10e8bf62
Author: intrvalia <sr@intrval.xyz>
Date: Sun Sep 25 14:02:41 2016 -0400
added a new feature
commit df7af48779b7c8b37823047c77b48e1ae1ca74d1
Author: intrvalia <sr@intrval.xyz>
Date: Sat Sep 24 20:28:43 2016 -0400
A line was added
commit f6d3ac50880a1a30b4f05be53fd431d9262d701b
Author: intrvalia <sr@intrval.xyz>
Date: Sat Sep 24 20:02:35 2016 -0400
My first commit |
OK! We have gone through the majority of this workshop. There are a couple more things that I would like to demontsrate:
- How to set up a repository to collaborate with others
- How to use the github desktop client – which will allow you to manage your repositories without using the terminal.
Git Hub & Collaboration
So far you have created and modified your own personal repository – locally on your own machine as well as setting up a remote connection to GitHub whereby you could upload and/or download any changes.
Now – the real power of using GitHub is that it allows you to collaborate with other people on the same project.
- When you create a repository on GitHub – you are the owner. That means, you get to decide who can collaborate on your repository. You are also responsible for maintaining the remote repository (i.e. dealing with pull requests).
- A repository hosted on GitHub is either public or private . If you do not have the student package and are not willing to pay – ALL repositories that you create will be public.
- Public Repository definition: Anyone can download your repository and have a working version on their own local machine. The Repository owner decides who can upload changes to the remote repository.
- Private Repository definition: The Repository owner decides who can download the repository and who can upload changes to the remote repository.
As we have set up our repositories to be public for this workshop: by default everyone should be able to potentially download a repository from someone else:
Collaboration experiment::
- Divide up into teams of two
- Login to your github account and open the page for the repository that we previously created.
- You should see a green button: “clone or download” – click on it and use should see a heading “Clone with HTTPS” along with a URL “https:// … “.
Clone is the git term for download a remote repository onto a local machine (somewhere else) – it is downloaded as a fully WORKING git repository. - Give this url to your partner (i.e. by email). – So now you should have their url and they should have yours
- Open your terminal and navigate to the projects folder on the desktop (you already have one repository in there (yours)) then use the git clone command to download your partner’s repository:
1
2
3
4
5
6
te:webProjects te$ git clone https://github.com/clabTest/initalTest.git
Cloning into 'initalTest'...
remote: Counting objects: 3, done.
remote: Total 3 (delta 0), reused 3 (delta 0), pack-reused 0
Unpacking objects: 100% (3/3), done.
Checking connectivity... done.
You should have similar output as above (though a different repository)
- Create and switch to a new local branch using the git command git checkout -b < branchname >
- Ok – now change the files /add a new file – and run the git commands to add and commit to your local repository – please work only in the master branch.
- Now you want to be able to push your changes and the new branch to the remote server. To do this correctly, you first need to officially become a collaborator on the repository.
- The owner of the repository has to explicitly give permission to any user who wants to push changes to the remote repository (and thereby changing it).
- Each owner should log into their github page and navigate to the page for the repository.
- Click on Settings icon in the top right and then in the left menu click on Collaborators. Search for your team mate by their git-username and invite them to join as a collaborator on your repository.
- Once they receive an email notification and ‘accept’ the invitation they will be able to push their changes to the server.
- As the collaborator – accept the invitation and now you can run the git push origin < branchname > command.
And there you go! – You are now able to collaborate in git! We will leave the task of creating a pull request for now – but will revisit it when we discuss using the github desktop client.
Using github desktop
- Download and install
- Adding an existing repository
- Cloning a repository
- Commits
- Synching (Pushing)
- Branches
- Pull Request
- Pulling lastest version